

The weather is warming up, and the open road is calling your name. It’s that exciting time of year when you get to pull your RV out of storage and prepare for a new season of adventures. Before you pack your bags and head out, a thorough inspection is crucial to make your trips safe and enjoyable. This dewinterizing checklist will walk you through everything you need to inspect, test, and restock to get your RV in top shape for your upcoming travels.
Taking your RV out of storage involves more than just hooking it up and driving away. After sitting for several months, your vehicle needs a comprehensive checkup to catch any issues that may have developed. From the tires to the rooftop and all the systems in between, a little preventative maintenance now can save you from major headaches later. Continue reading to discover a great checklist to use when you’re taking your RV out of storage.
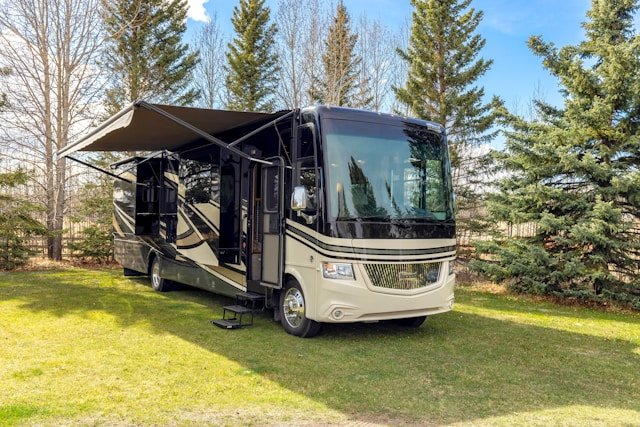
Inspect the RV Exterior
Walk-Around Inspection
Your first step is to give the outside of your RV a detailed walk-around inspection. Even in storage, winter weather can take a toll on your vehicle’s exterior. Look for any signs of damage that might have occurred. Check the roof for cracks, separations in the seals, or damage from debris. Pay close attention to the seals around vents, skylights, and air conditioning units, as these are common points where leaks can start.
Closely Inspect RV Body
Next, examine the body of the RV. Look for any new dents, scratches, or signs of rust that might need attention. Inspect the windows and doors to confirm they open, close, and lock properly. You should also check the awnings for any tears or signs of mildew that may have formed. A small issue found now is much easier and cheaper to fix than one discovered during a downpour on your first trip out. A thorough external check sets the stage for a problem-free season.
Check the Tires
Your RV’s tires are one of its most critical safety components, and they need careful attention after a long storage period. Start by checking the tire pressure on all tires, including the spare. Tires can lose pressure over time, and driving on underinflated tires is dangerous. Inflate them to the manufacturer’s recommended PSI, which you can typically find on a sticker inside the driver’s side door or in your owner’s manual.
While you are checking the pressure, also inspect the tires for signs of wear and tear. Look for cracks in the sidewalls, which can indicate dry rot, a common problem for RVs that sit for extended periods. Check the tread depth to confirm it is adequate for safe driving. If you notice any significant wear, bulging, or cracking, it is best to replace the tires before you hit the road. Properly maintained tires are essential for a safe journey.
Examine the RV Interior
Once you have inspected the exterior, it is time to move inside and check the interior of your RV. The first thing you will want to look for is any evidence of pests. Rodents and insects can find their way into stored RVs, causing damage and creating unsanitary conditions. Look for droppings, chewed wires, or nests in cabinets, drawers, and other hidden spaces. A thorough cleaning will help remove any unwanted visitors.
Next, check for any signs of water damage or mold. Inspect the ceilings, walls, and floors, paying special attention to the areas around windows, vents, and slide-outs. Water leaks can lead to significant structural damage and mold growth, which can pose health risks. If you smell a musty odor, that could be a sign of hidden mold. Address any leaks you find immediately to prevent further damage. This fix is a vital part of any good guide to RV storage and dewinterizing.
Test RV Systems
With the interior and exterior inspected, the next step is to test all your RV’s essential systems. Begin with the plumbing. If you winterized your RV with antifreeze, you will need to flush the entire system with fresh water until the water runs clear and has no residual taste. Run water through all the faucets, both hot and cold, and flush the toilet several times. While the water is running, check under sinks and around the toilet for any leaks.
Next, move on to the electrical system. Connect your RV to a power source, or use the onboard generator, to test all electrical components. Turn on all the lights, test the outlets, and check the operation of the slide-outs and leveling jacks. You should also test all the appliances, including the refrigerator, microwave, stove, and air conditioner. Finally, inspect your propane system. Check the propane levels in your tanks and look for any leaks in the lines. A comprehensive systems check confirms everything is in working order.
Restock Essential Supplies
The final step before you can hit the road is to restock all your essential supplies. Start by replenishing your kitchen with non-perishable food items, cooking utensils, and cleaning supplies. Check the expiration dates on any items left over from last season and replace them as needed. Make sure you have fresh linens, towels, and toiletries for the bathroom.
It is also a good time to review your safety and emergency equipment. Check your first-aid kit and replace any used or expired items. Confirm your fire extinguishers are fully charged and easily accessible. You should also have an emergency kit with tools, flashlights, extra batteries, and road flares. Having all your supplies organized and ready makes the start of your trip smooth and stress-free.
Prepare for Adventure
By following this RV dewinterizing checklist, you can methodically prepare your RV for a new season of exploration. A careful inspection of the exterior, tires, interior, and operating systems helps you catch potential problems before they become major issues on the road. Taking the time to dewinterize properly and restock your RV provides peace of mind, allowing you to focus on the fun and adventure that awaits. Now, all that is left to do is plan your first destination. Where will your RV take you this year?
Feature Photo courtesy of luckybusiness via Adobe Stock


